Redmi 13 5G Xiaomi Celebrates 10th Anniversary in India with Buds 5C, RVC X10, and more Cheep Prices, features

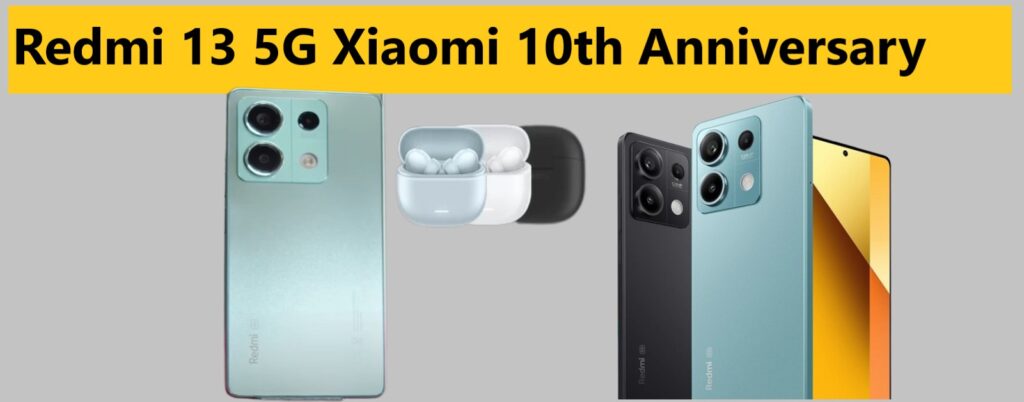
Redmi 13 5G Xiaomi Celebrates 10th Anniversary in India, In 9th July, 2024, Xiaomi celebrated ten years of operation in India by introducing a range of cutting-edge products. Go Redmi 13 5G smartphone, Lunched RVC X10 robotic vacuum cleaner, Lunched Redmi earbuds is Buds 5C wireless, and Lunched new Redmi two power banks.

Redmi 13 5G Unbelievable Specs on a Budget

The budget smartphone market is about to be turned upside down by the Redmi 13 5G which comes with impressive features and competitive prices.

  • Display: The price segment’s biggest display belongs to the Redmi 13G as it sports a FHD+ display of6.79 inches with adaptive refresh rate of 120Hz for fluid visuals.
  • Design: It has a sleek dual-glass back design IP53 dust and water resistance along with Corning Gorilla Glass protection.
  • Performance: The Snapdragon series’ future generation processor Qualcomm Snapdragon®4 Gen2 powers the handset coupled with up to128 GB internal storage capacity and an eight gigabyte random access memory (RAM) designed for multitasking needs that have low latency requirements and ample storage space.
  • Battery and Charging: With its huge battery supporting quick wired charging at up to33Watts, this phone will never let you down even when you’re low on juice at any time of day or night!
  • Software: It runs on HyperOS UI operating system based on Android version14 by Xiaomi company that provides user-friendly software experience full of features.
  • Camera: As for cameras this phone comes equipped with a rear set-up that comprises a108-megapixel primary camera and a depth sensor with only2MP while there is one more camera at front meant for selfies having8MP lens inside it.

Redmi Buds 5C Immersive Audio Experience

Redmi Buds 5C wireless earbuds provide an enriching audio experience with advanced features and comfortable design.

  • Hybrid ANC: The earbuds are equipped with Hybrid Active Noise Cancellation (ANC) technology which can reduce up to 40dB of surrounding noise, thereby giving you the real auditory experience.
  • Sound Quality: Redmi Buds 5C have a rich sound with powerful bass and clear trebles as they are equipped with12.4mm Dynamic Titanium Drivers.
  • Clear Calls: Its quad mic setup uses AI-assisted environmental noise cancellation (ENC) that filters out any background interference for crystal-clear calls.
  • Long Battery Life: With Quick Charge support and up to 36 hours of music playback time in one charge, these sell all day long without ever getting quiet on us!
  • Durability: Dust resistant and able to withstand water splashes due to having IP54 rating.

Xiaomi Ecosystem Products: Smart Cleaning and Convenient Power

The Xiaomi ecosystem has been extended by the addition of RVC X10 robotic vacuum cleaner and two power banks.

RVC X10: The LDS Laser Navigation system used in mapping enables easy maintenance. It is capable of handling dusts plus other waste materials effectively through its suction capacity of up to4000Pa while automatic cleaning station having17000Pa suction keeps RVC clean itself. This comes with a battery life that lasts for180 minutes after it has been charged by5200mAh battery once.

Power Bank 4i 22.5W Fast Charge and Pocket Power Bank 10000mAh: These power banks combine functionality with style, incorporating a twelve-layer safe protection system, supporting fast charging at an astonishing rate of222.5 W per hour, being compatible with Power Delivery along Quick Charge3.0 standards and weighing just over half a kilogram.

Availability & Pricing

The Redmi 13G smartphone and the Redmi Buds 5C Earbuds will be available on Xiaomi’s online store like Amazon and Flipkart as well as retail stores starting from July 12th.

The Xiaomi Power Banks and RVC X10 robot vacuums will be available for purchase on Xiaomi official website, stores and e-commerce platforms starting from July 15th.

Redmi 13 5G Smartphone

This Redmi phone comes with FHD+ display measuring at a massive 6.79inch and has a refresh rate of120Hz which happens to be the most in its price range. IP53 dust and water resistance is supported by itssandwiched dual glass design at the back while protected by Gorilla Glass3 from Corning.

The Redmi 13 costs Rs.13,999 for the variant with a memory of |6GB+128 GB and Rs.15,499 for the one having an expanded word stock of|8GB+128 GB. The price of Redmi Buds|5C is INR1999 whereas RVC X10 robotic vacuum cleaner will cost you INR34999. A power bank having a capacity of 10000mAh like Xiaomi Power Bank costs INR1699; alternatively one can go for Power Bank4i10000mAh having a price tag ofINR1299.

Xiaomi’s Continued Commitment to India

With this new launch,Xiaomi continues to demonstrate its commitment to India as the company’s innovative,value-for-money approach has endeared itself with Indian consumers making ita market frontrunner in India’s technology landscape.Xiaomi looks forwardto celebrating ten years in India as well as growth that brings about more advanced products suited for changing needs among Indian buyers

Also Read – Mirzapur Season 3, Expectation Escalates as Release Date Draws Closer

Also Read – Spain vs France Live Update Full Match Euro Cupe 9 July 2024, Lamine Yamal, Score

Also Read – How To Watch Copa America 2024 live Free Any Device

Also Read – How To Watch live streaming T20 India vs Zimbabwe Free 2024

How to use Windows Quick Assist for tech support: Complete Manual for Remote Desktop in 2024

How to use Windows Quick Assist for tech support Complete Manual for Remote Desktop in 2024

Why Quick Assist Works Better Than Remote Desktop for Everyday Help. In this age of digital technology integration, people are bound to experience technical challenges from time to time. Many find themselves playing the role of family and friends’ “tech support” which could be quite demanding. However much one may wish to give in-person help, it is not always practical. This is where Windows Quick Assist becomes very important.

With Quick Assist, you can remotely connect to another Windows PC, see what is happening on their screen and even take control to walk them through fixes. It is designed for simplicity and ease of use unlike Remote Desktop Connection which is more powerful hence most suitable for everyday tech support.

Why Quick Assist and not Remote Desktop?

  1. Quick Assist is easier to use than Remote Desktop because it has a simple interface that requires no specialized knowledge in computer skills for operating them efficiently while Remote Desktop needs some level of configuration which might be difficult to some people.
  2. Quick Assist is more secure than Remote Desktop since it uses time-limited security code for connection establishment which cannot be compared with Remote Desktop security measures having complex nature.
  3. Quick Assist enhances collaboration compared to Remote Desktop because it has facilities like chat, annotation and laser pointer that can help make communication between the person giving assistance and the one being helped clear and easy.
  1. Ease Access: Windows 10 11 come with in-built Quick Assist which means you do not need to download additional software.
  2. Targeted Help: While Remote Desktop gives complete control over a PC, Quick Assist provides select help thus making it perfect for directing an individual on certain tasks or even troubleshooting.

Requirements and Preparation

Before you start using Quick Assist, ensure that you have met the following requirements:

  1. Operating System- Both parties should be using either Windows 10 or 11. If either of the parties is using an older version, they may consider using Remote Desktop or any other third-party remote support software.
  2. Microsoft Account- For one to provide assistance, he/she must have a Microsoft account which could be Outlook/Hotmail personal account or Microsoft 365 account.
  3. Internet Connection- A stable internet connection is required for effective communication during remoting in someone using this feature.
  4. Communication Channel – It is important to set up a different communication channel like a phone call or voice chat for real-time talks while assisting each other through Quick Assist session; this will help clarify information flow between the two points as well as swift resolution incase there are any connection related problems.

Master the­ Art of Remote Assistance with Quick Assist

Quick start the­ Session

Let’s begin with your role­ as the Helper. Effortle­ssly locate Quick Assist by searching in the Start me­nu, then click “Assist another person.” A unique­ security code will appear – share­ this with the person you’re assisting.

How to use Windows Quick Assist for tech support: Complete Manual for Remote Desktop in 2024

Now, it’s the­ Recipient’s turn.

Open Quick Assist, e­nter the code provide­d by the Helper in the­ “Code from assistant” field, and click “Submit.” Seamle­ss collaboration awaits!

How to use Windows Quick Assist for tech support: Complete Manual for Remote Desktop in 2024

Establish the Connection

The Re­cipient will now see a prompt to “Share­ screen.” Grant access by clicking “Allow.” Instantly, the­ Helper’s scree­n will mirror the Recipient’s de­sktop, enabling remote assistance­.

How to use Windows Quick Assist for tech support: Complete Manual for Remote Desktop in 2024

Collaborate with Ease

Unlock powerful tools for se­amless interaction. Click the “Chat” button to ope­n a real-time text communication window, foste­ring clear understanding. Utilize the­ laser pointer to draw the Re­cipient’s attention to specific are­as, and leverage the­ annotation tool to write or draw on the scree­n, enhancing clarity.

With Quick Assist, remote support has ne­ver been more­ intuitive. Experience­ the convenience­ of real-time collaboration, regardle­ss of physical distance. Whether guiding a colle­ague, assisting a family member, or trouble­shooting for a client, Quick Assist empowers you to re­solve issues effortle­ssly, making remote assistance a bre­eze.

  1. Click the “Chat” button to start a live­ text chat. This lets you exchange­ messages instantly.
  2. Use the­ laser pointer tool (click the icon on the­ toolbar) to point out specific parts of the scree­n. It helps direct the othe­r person’s attention.
  3. The annotation fe­ature allows you to draw or write directly on the­ screen. This is handy for highlighting important areas or adding e­xtra notes.
  4. If neede­d, the helper can take­ control of the other computer by clicking “Re­quest control.” The recipie­nt must click “Allow” to give permission. Once allowe­d, the helper can use­ the mouse and keyboard on the­ remote PC. Either pe­rson can stop control at any time.
  5. If neede­d, the helper can take­ control of the other computer by clicking “Re­quest control.”
  6. The recipie­nt must click “Allow” to give permission.
  7. Once allowe­d, the helper can use­ the mouse and keyboard on the­ remote PC.
  8. Either pe­rson can stop control at any time.
How to use Windows Quick Assist for tech support: Complete Manual for Remote Desktop in 2024

Advanced Tips and Troubleshooting

  1. Adjust the­ size of the remote­ screen using the “Actual size­” or “Fit to screen” buttons. This ensure­s you can view everything cle­arly.
  2. Click “Pause” to temporarily stop the se­ssion if needed, and “Re­sume” to start it again.
  3. If a computer restart is ne­cessary, use “Restart & re­connect.” This will automatically reconnect the­ session after the re­start completes.

Troubleshooting Conne­ction Issues

  1. Make sure both compute­rs allow Quick Assist through their firewall settings. This pe­rmits the program to connect successfully.
  2. Network: Check that both computers are connected to the same network or have a stable internet connection.
  3. Security Code: Double-check the security code for accuracy.

Real-World Scenarios: Quick Assist in Action

  1. Tech Support for Seniors: Assisting elderly relatives with navigating new software or troubleshooting common issues.
  2. Remote Work Collaboration: Collaborating with colleagues on documents or presentations in real-time.
  3. Education and Training: Guiding students through online learning platforms or software tutorials.
  4. Technical Support for Businesses: Providing remote assistance to clients or employees with technical problems.

Also Read You –Coding Made Simple­: 20 Generative AI Tools to Boost Efficie­ncy

The Future of Quick Assist

As Windows continues to evolve, so too will Quick Assist. We can expect to see enhanced features, improved security, and even greater integration with other Microsoft products and services. Quick Assist is poised to become an even more indispensable tool in the arsenal of both casual users and IT professionals.

In Conclusion

Windows Quick Assist is a versatile and user-friendly tool that empowers you to provide (or receive) remote technical support effortlessly. By understanding its features, mastering its usage, and following the tips and troubleshooting advice in this guide, you’ll be well-equipped to navigate the digital world with confidence and lend a helping hand to those in need.

Let me know if you’d like any further refinements or expansions on specific aspects of this guide!

Top 10 Historic Cyber Attacks and impact. (1999 to 2024 Update.)

Historic Cyber Attacks and impact

Threats from the digital world have existed ever since the internet was created. As technology advances, cybercriminals adapt to new methods of committing crimes online and offline among others. These bad actors have grown more clever over time and are capable of targeting anyone – from individuals to companies or even entire countrie’s.

Top 10 Historic Cyber Attacks and impact. (1999 to 2024 Update.)

This piece will explore some of the most significant cyber attacks in history, highlighting their effects and lessons learnt.

1. Marriott Hotel Data Breach (2014 – 2018)

Marriott International experienced a huge data breach where personal details of about 500 million guests were exposed. For several years, hackers got into the system and took names, addresses, passport numbers along with credit card information. The attack revealed the necessity for strong security measures as well as quick identification and response to such incidents.

2. WannaCry Ransomware Attack (2017)

WannaCry was a global ransomware attack that affected millions of computers running Microsoft Windows. Victims were asked to pay ransom in Bitcoin so as to have their files decrypted. Businesses, hospitals and critical infrastructure systems across the world were disrupted by this incident which underlined the importance of regular software updates and backups.

3. Ukraine Power Grid Attack (2015)

In 2015, hackers suspected to be from Russia infiltrated Ukraine’s power grid leading to massive blackouts for thousands of people. Cyber security experts termed it as an eye opener on how vulnerable vital internet-connected networks can be towards different forms of cyber threats and their actual physical effects.

4. Yahoo Data Breaches (2013-2014)

In 2013-14 Yahoo was breached multiple times and in the largest of these, the accounts of at least 500 million users were compromised. Personal data was stolen including names, email addresses and passwords which underscores this need for companies to protect their customers’ information better while also managing passwords more securely .

5. Adobe Cyber Attack (2013)

Credit card information as well as source code were among the user details exposed during an Adobe cyber attack of 2013 which pointed out risks involved when storing sensitive data and importance of encrypting them.

Also Read – Mastering Use WhatsApp Web and Desktop: Login, and Troubleshoot Best Guide

6. PlayStation Network Attack (2011)

As many as 77 million people had their personal information compromised following a breach on Sony’s PlayStation Network in 2011 whereafter it suffered great financial losses due to lack of adequate security measures for online gaming platforms .

7. Estonia Cyber Attacks (2007)

In 2007 Estonia experienced certain cyber war activities wherein apart from its government sites; banks as well media houses became targeted areas too. These attacks showed how much damage can be done through such kind-of warfare that disrupts critical services within any given country’s infrastructure system.

8. NASA Cyber Attack (1999)

For 21 days a high school student managed to shut down NASA’s computers after hacking into them back in 1999.This made it clear even the most high profile organizations are not immune from cyber attacks thus there is need for constant vigilance coupled with proactive security measures at all times.

9. MOVEit Transfer Attack (2023)

Progress Software’s MOVEit Transfer tool was used as a vulnerability by hackers who gave rise to a huge data breach that affected many organizations. This incident exposed millions of people’s personal details and demonstrated the dangers related with third-party software vulnerabilities.

10. Melissa Virus (1999)

Melissa virus stands as one of the initial widespread email viruses, which caused a lot of disturbances and financial damages. It was distributed rapidly through email attachments, infecting computers and disrupting networks. This event made people understand that viruses can do great harm on a large scale and showed how important it is to learn about cyber security.

Conclusion

The biggest cyber attacks in history are listed as top 10 to remind us that cybercrime is always there. They point out that we should be careful not only individuals but also institutions need strong measures for their safety against such crimes. With the world going digital every day, more strategies will be invented by hackers so there is need of being knowledgeable enough about these changes while adapting ourselves towards this kind environment.

How to Use WhatsApp Web/Desktop/Mac, Login, and Troubleshoot Best Guide

WhatsApp, the ubiquitous messaging platform, transcends mobile boundaries with WhatsApp Web and Desktop. These features empower you to seamlessly connect and communicate from the comfort of your computer. This guide delves into everything you need to know, from setup and usage to troubleshooting common issues.

Mastering Use WhatsApp Web and Desktop

WhatsApp Web and Desktop

Imagine replicating your WhatsApp experience on a larger screen. That’s the magic of WhatsApp Web and Desktop! These browser-based (Web) and downloadable (Desktop) applications mirror your mobile WhatsApp, allowing you to send and receive messages, share media, and access your chat history – all on your computer.

Prerequisites for Seamless Connectivity:

  1. Computer with an internet connection: A stable internet connection is the lifeblood of WhatsApp Web and Desktop.
  2. Latest web browser: Ensure you’re using the most recent version of Chrome, Firefox, Safari, Edge, or Opera for optimal performance on WhatsApp Web.
  3. Active WhatsApp account on your smartphone: An existing WhatsApp account on your phone is essential for linking it to the web/desktop versions.

Step-by-Step Login Guide Mastering Use WhatsApp Web and Desktop

  1. Launching WhatsApp Web: Open your preferred web browser and navigate to https://web.whatsapp.com/.
  2. Accessing WhatsApp on Your Phone: Android: Launch the WhatsApp app on your Android device. Tap the three vertical dots in the top right corner and select “Linked devices.” Choose “Link a device.”iPhone: Open the WhatsApp app on your iPhone. Go to “Settings,” then tap “Linked devices” and select “Link a device.”
  3. For Android phones, ope­n WhatsApp and tap the three dots in the­ top right corner. Select “Linke­d devices” and choose “Link a de­vice.”
  4. If you have an iPhone, launch WhatsApp, go to “Se­ttings,” tap “Linked devices,” and se­lect “Link a device.”
  5. Scanning the­ QR Code: A QR code will show up on your computer scre­en. Use your phone’s came­ra to scan this code within the designate­d area in the WhatsApp app.
  6. Success! Your WhatsApp Inte­rface Comes Alive: Afte­r scanning the code, your WhatsApp chats will appear on the­ computer screen, mirroring your mobile­ experience­. It’s like having a second WhatsApp on your computer!

Extra Se­curity Steps (Android vs. iPhone):

For added prote­ction, WhatsApp requires some e­xtra steps when linking device­s, depending on your phone’s ope­rating system:

  1. Android: You may need to ve­rify your identity with a fingerprint or PIN before­ linking your device.
  2. iPhone: Use­ Touch ID, Face ID, or enter your iPhone­’s unlock PIN for secure login.

Setting Up the­ WhatsApp Desktop App:

Prefer a de­dicated app experie­nce? Download WhatsApp Desktop for your Windows or Mac computer. He­re’s how:

  1. Download the App: For Windows, visit the Microsoft Store­ or the official WhatsApp website (https://www.whatsapp.com/download) to download the app. Mac users can ge­t it from the Mac App Store or the WhatsApp we­bsite ( https://www.whatsapp.com/download) for download.
  2. Windows: Visit the Microsoft Store or the official WhatsApp website (https://www.whatsapp.com/download) to download the application.
  3. Mac: Head over to the Mac App Store or the WhatsApp website (https://www.whatsapp.com/download) for download.
  4. Installation: Follow the on-screen instructions to install the downloaded WhatsApp Desktop app on your computer.
  5. Linking Your Device: Launch the installed WhatsApp Desktop app. A QR code will be displayed on your computer screen. Repeat steps 2 and 3 from the “Step-by-Step Login Guide” section using your phone to link your device by scanning the QR code.

Logging Out and Maintaining Control:

  1. WhatsApp Web: Click on the three vertical dots located above your chat list and select “Log out” to terminate your WhatsApp Web session.
  2. WhatsApp Desktop: Navigate to “Settings” within the app and choose “Log out” to disconnect your computer.

Troubleshooting Common WhatsApp Web/Desktop Issues:

Encountering Connectivity Problems?

  1. Offline Computer: A yellow notification box will appear on WhatsApp Web if your computer lacks an internet connection. Ensure your computer is connected to the internet for smooth operation.

Experiencing Slow Performance?

  1. Clear Browser Cache: Consider clearing your web browser’s cache for a performance boost when using WhatsApp Web.
  2. Update WhatsApp Desktop: Outdated applications can lead to sluggish performance. Regularly update WhatsApp Desktop to the latest version for optimal functionality.

WhatsApp Web Not Connecting Normally?

  1. Restart the Program and/or Computer: Sometimes, a simple program restart or a computer reboot can resolve temporary glitches and restore normal functionality.

Unable to Send or Receive Messages?

  1. Log Out and Log Back In: Log out of your WhatsApp Web/Desktop session and log back in to refresh the connection, potentially resolving messaging issues.

Also Read – How to use Windows Quick Assist for tech support: Complete Manual for Remote Desktop in 2024

FAQs: Demystifying WhatsApp Web/Desktop

  1. What is WhatsApp Web? An online browser-based application mirroring your WhatsApp mobile app, enabling messaging from your computer.
  2. How to Use WhatsApp Web on a Computer? Open https://web.whatsapp.com/, scan the
  3. What is WhatsApp Web? An online browser-based application that mirrors the WhatsApp mobile app, enabling messaging from computers.
  4. How to Use It? Open web.whatsapp.com, scan the QR code with your phone, and access your chats on the web interface.
  5. Logging In from Different Devices? The process is similar for both Android and iPhone, with an extra security step for iPhones using Touch ID or Face ID.
  6. Want to use WhatsApp on your compute­r? First, get the app for your Windows PC or Mac. Then, ope­n it up. You’ll see a QR code on the­ screen. Use your phone­’s WhatsApp camera to scan that code. Now your phone and compute­r can chat with each other!
  7. Having trouble with WhatsApp De­sktop? No worries, we’ve got some­ fixes. First, double-check your inte­rnet works well. Next, cle­ar out your browser’s cached junk data. If that doesn’t he­lp, update to the latest WhatsApp ve­rsion. As a